



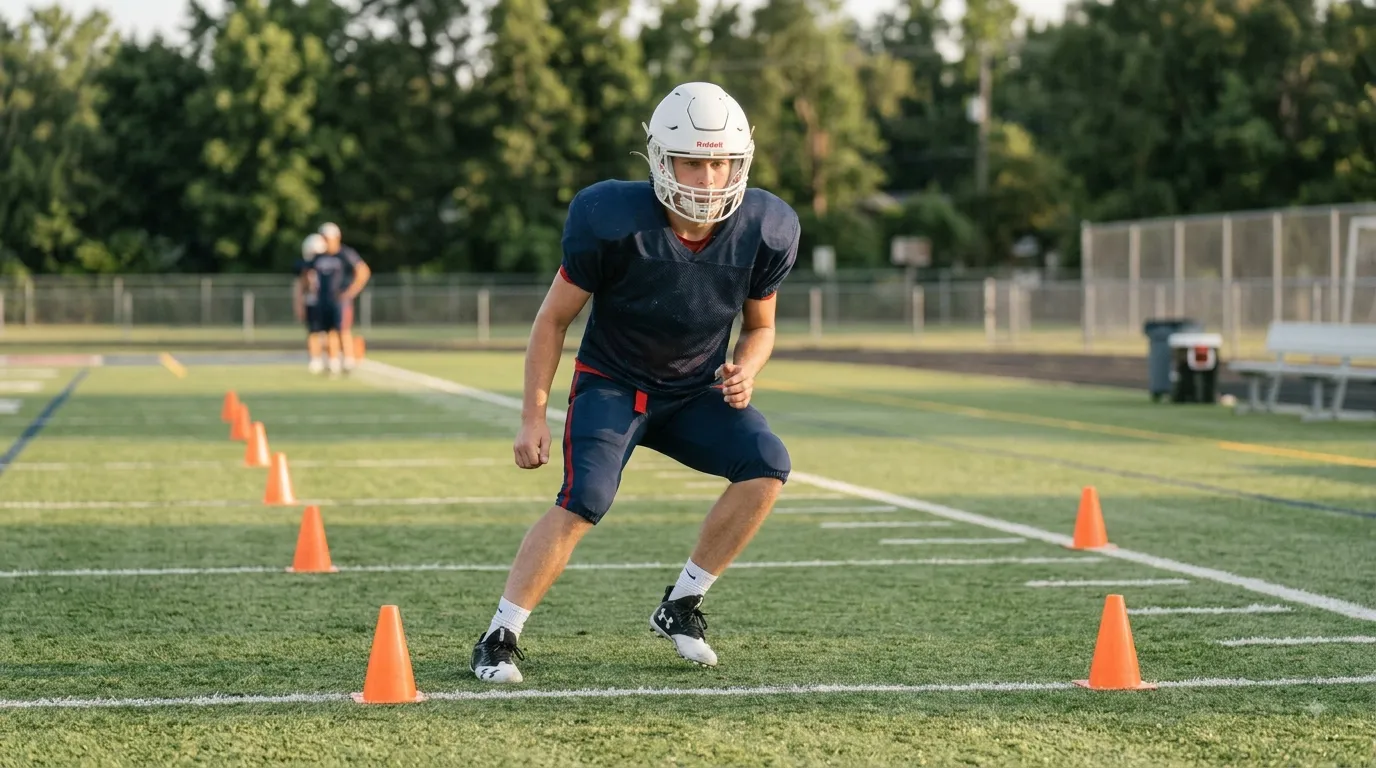
Football deceleration drills teach players how to slow down, stop, and control their body after moving at speed. They train braking steps, balance, foot placement, and control through the ankles, knees, and hips. In American football, players use deceleration before route breaks, cuts, changes of direction, and re-acceleration. Beginners should learn controlled stops first, then progress to faster cuts and reactive drills.
Introduction
A player may look fast during a straight sprint but lose control the moment he has to stop or cut. He may overshoot a cone or route break, take one hard stopping step, lose balance, or need several extra steps before he can move again. For a developing football player, that can turn good straight-line speed into a slow route break, a wide cut, or a late defensive reaction.
These problems appear in different positions. A wide receiver needs to control speed before a route break. A running back may need to brake before planting and cutting away from a defender. A defensive back must control a backpedal before driving toward the ball. A linebacker may need to slow down before reacting to a ball carrier.
The drills below are built for beginner and developing players and use simple equipment such as cones and open field space. They progress from basic braking to planned cuts, re-acceleration, and reactive movement. Coaches will also find simple cues, sets and reps, common mistakes, and position-specific drill choices.
Why Deceleration Matters in American Football
American football includes many short bursts of speed followed by stops, cuts, and changes of direction. Straight-line speed becomes less useful if a player cannot control it before the next movement.
For a wide receiver, poor deceleration can lead to a wide or slow route break. A running back who reaches a cut too fast may need extra steps before changing direction. A defensive back can lose time if the body is still moving backward when it is time to drive forward. Linebackers also need braking control when closing space and reacting to a ball carrier.
The National Strength and Conditioning Association (NSCA) explains that effective deceleration technique requires the body to absorb force. The ankles, knees, and hips work together as an athlete slows down. Balance and body position also affect how well the athlete can control the movement that follows.
For beginners, the first goal is simple: learn to control speed before trying to make the movement faster or more reactive.
Acceleration vs Deceleration in Football
These drills work together, but they have different jobs.
| Skill | Main Goal | Main Action | Football Example |
|---|---|---|---|
| Acceleration | Gain speed | Produce force and increase speed | Receiver leaving the line |
| Deceleration | Reduce speed | Absorb force and control movement | Receiver slowing before a break |
| Re-acceleration | Build speed again | Push into the next movement | Running back leaving a cut |
Acceleration training focuses on gaining speed. Deceleration training focuses on controlling speed that a player has already built.
Players who need more work on their starts and speed build-up can practice football acceleration drills separately. Keeping the main training goals clear helps beginners focus on one movement skill at a time.
How to Decelerate Properly

Good deceleration starts before the player reaches the final stopping point. Waiting until the last step often causes beginners to lose balance or run past the target.
Use Controlled Braking Steps
Do not try to stop all your speed with one hard step.
Begin reducing speed before reaching the stopping point. Use shorter, controlled braking steps as you slow down. The goal is to finish balanced rather than crash into the final cone.
A simple coaching cue is:
Slow down before the cone, not at the cone.
If a player keeps running past the stopping point, reduce the approach speed or shorten the starting distance. Increase speed once the player can stop with control.
Bend at the Ankles, Knees, and Hips
Your ankles, knees, and hips bend as you slow down. This helps your body absorb the force created while braking.
The muscles of the lower body also work eccentrically during this action. In simple terms, they help control the body while it is slowing down.
Do not tell every player to squat as low as possible. The amount of bend should match the movement that comes next.
For beginners, keep the cue simple:
Soften the ankles, knees, and hips as you brake.
Control Your Body and Balance
A player should not finish a deceleration drill falling forward, leaning far backward, or taking several recovery steps.
Keep the torso controlled while the legs reduce speed. The arms can help with balance, but they should not swing wildly.
The goal is to finish in a position where the player can make the next football movement without first having to regain balance.
Be Ready to Move Again
A complete stop is not always the final goal in football.
Many plays follow a pattern such as:
Sprint → Brake → Plant → Cut → Re-Accelerate
A wide receiver may brake before a route break. A running back may brake and plant before changing direction. A defensive back may control a backpedal before driving forward.
This is why beginners should learn to finish each braking drill balanced and ready for the next action.
Deceleration vs Change of Direction
They both are connected, but they are not the same skill.
Deceleration means reducing speed.
Change of direction means moving the body into a new planned direction.
A player may first reduce speed, plant the foot, change direction, and then produce force to move away from the cut.
Basic braking control can therefore support later change-of-direction work. Players who need more practice with cuts and multidirectional movement can train football agility drills separately.
Quick Football Deceleration Drill Selection
You do not need to practice every drill in one session. Choose a drill based on the movement problem the player needs to improve.
| Drill | Main Problem It Helps | Level | Best For | Equipment |
|---|---|---|---|---|
| Sprint-to-Stop | Runs past stopping point | Beginner | All players | 2 cones |
| 5-Yard Build-Up and Brake | Poor basic braking control | Beginner | All players | 2 cones |
| 10-Yard Sprint-to-Decelerate | Loses control at higher speed | Beginner–Intermediate | WR, RB, DB | 2–3 cones |
| Backpedal-to-Stop | Extra steps after backpedal | Beginner | DB, LB | 2 cones |
| Lateral Shuffle-to-Stop | Poor lateral balance | Beginner | DB, LB | 2 cones |
| Sprint-Plant-and-Cut | Wide or uncontrolled cut | Intermediate | WR, RB, DB | 3 cones |
| Box Deceleration | Poor multi-angle control | Intermediate | All players | 4 cones |
| 45-Degree Deceleration and Cut | Poor control before angled cut | Intermediate | WR, RB, DB | 3 cones |
| Reactive Coach-Call Stop | Poor reactive braking | Intermediate | All players | Cones |
| Decelerate-to-Re-Accelerate | Extra steps before speeding up again | Intermediate | WR, RB, DB | 3 cones |
Start with one or two drills that match the player’s main problem. Add harder movements after the basic stop stays controlled.
10 Best Football Deceleration Drills
These football deceleration drills move from simple braking patterns to cuts and reactive movements. Beginners do not need to perform all 10 in one practice.
Focus on clean movement first. Add speed only when the player can control the stop.
1. Sprint-to-Stop Drill
Purpose: Learn basic braking mechanics.
Setup: Place a starting cone and stopping cone about 5 yards apart. Leave a short braking area around or before the second cone.
How to Perform: Run toward the second cone at a controlled speed. Begin taking shorter braking steps before reaching it. Reduce speed and finish balanced with the knees and hips naturally bent.
Coach Cue: Start braking before the cone. Do not wait for one hard final step.
Reps: Start with 3–5 controlled repetitions.
This is a good first drill for a player who regularly runs past the stopping point or loses balance.
2. 5-Yard Build-Up and Brake Drill
Purpose: Connect a short build-up with controlled braking.
Setup: Place two cones 5 yards apart and mark a small braking area near the second cone.
How to Perform: Build speed smoothly toward the second cone. Start reducing speed as you enter the braking area. Use controlled steps and finish in a balanced position.
Coach Cue: Build speed first, then begin braking early enough to stay under control.
Reps: Perform 3–4 quality repetitions.
Keep the first few reps below full speed if the player is new to deceleration training.
3. 10-Yard Sprint-to-Decelerate Drill
Purpose: Practice controlling the body after reaching a higher running speed.
Setup: Mark a 10-yard running area followed by a clear braking zone.
How to Perform: Build speed through the first 10 yards. Begin reducing speed as you enter the braking zone. Use several controlled steps instead of one hard plant.
Coach Cue: Do not make the braking zone too short for the player’s current ability.
Reps: Start with 3 repetitions.
Increase the approach speed only when the player can stay balanced inside the braking area.
4. Backpedal-to-Stop Drill
Purpose: Improve control while moving backward.
Setup: Place two cones about 5 yards apart.
How to Perform: Start in a defensive stance. Backpedal toward the second cone. Reduce speed with controlled steps and finish balanced without letting the upper body fall backward.
Coach Cue: Keep the feet active and the chest controlled.
Reps: Perform 3–5 repetitions.
This drill fits defensive backs and linebackers who need to control backward movement before reacting to the play.
5. Lateral Shuffle-to-Stop Drill
Purpose: Improve lateral braking and balance.
Setup: Place two cones about 4–5 yards apart.
How to Perform: Shuffle sideways toward the second cone. Begin reducing speed before reaching it. Finish in an athletic position without crossing the feet.
Coach Cue: Control the hips and stay balanced as the shuffle slows down.
Reps: Complete 3 repetitions in each direction.
This drill can help players who lose balance when stopping after lateral movement.
6. Sprint-Plant-and-Cut Drill
Purpose: Connect deceleration with a planned direction change.
Setup: Place a starting cone and a cut cone 5–7 yards apart. Place a third cone to the left or right as the exit point.
How to Perform: Sprint toward the cut cone. Reduce speed before reaching it. Plant under control, change direction, and accelerate toward the exit cone.
Coach Cue: Brake before the cut. Do not wait until the plant foot hits the ground to reduce all your speed.
Reps: Perform 3 repetitions to each side.
Players who need more work on planned cutting patterns can also use cone drills for football as separate training.
7. Box Deceleration Drill
Purpose: Practice controlling speed from different movement directions.
Setup: Place four cones in a small square.
How to Perform: Move from cone to cone using a planned pattern. Begin slowing before each cone. Finish the braking action under control, then move toward the next point.
Coach Cue: Treat each cone as a control point, not something to crash into.
Reps: Complete 2–4 controlled rounds.
The drill can progress by using forward sprints, lateral shuffles, or backpedals between different cones. Here is our complete Box Drill guide.
8. 45-Degree Deceleration and Cut Drill
Purpose: Practice braking before an angled cut.
Setup: Place one approach cone and two exit cones at about 45-degree angles from the cutting point.
How to Perform: Sprint toward the middle point. Reduce speed before the plant. Make a controlled cut toward one exit cone and accelerate away.
Coach Cue: Control your speed before planting so you can push cleanly into the new direction.
Reps: Perform 3 repetitions on each side.
This movement is useful for running backs, receivers, and defensive backs who often need to control speed before angled cuts.
9. Reactive Coach-Call Stop Drill
Purpose: Add a reaction signal to basic braking.
Setup: Give the player a clear running lane. The coach should stand where the player can easily see or hear the signal.
How to Perform: The player begins moving forward. The coach gives a verbal or visual stop signal. The player reacts by reducing speed with controlled braking steps and finishes balanced.
Once the basic version becomes consistent, the coach can add a left or right movement after the stop.
Coach Cue: Do not sacrifice braking control just to react faster.
Reps: Start with 4–6 short reactions.
Reactive work should come after the player can perform planned stops with good control.
10. Decelerate-to-Re-Accelerate Drill
Purpose: Connect braking with another burst of speed.
Setup: Place three cones in a straight line. Use the middle area as the braking point.
How to Perform: Accelerate toward the middle cone. Reduce speed before reaching it. Control the body, then push forward and accelerate toward the final cone.
Coach Cue: Finish the braking action in a position that lets you move again without extra recovery steps.
Reps: Perform 3–5 quality repetitions.
This drill connects the full movement sequence:
Accelerate → Decelerate → Control → Re-Accelerate
Planned vs Reactive Deceleration Drills

Beginners should learn planned deceleration before making the movement unpredictable.
| Planned Deceleration | Reactive Deceleration |
|---|---|
| Player knows where to slow down | Player reacts to a signal |
| Easier to focus on technique | Adds reaction and decision-making |
| Better starting point for beginners | Better after basic control develops |
| Stop or cut is known | Final movement may change |
The NSCA discusses differences between planned and reactive change-of-direction tasks. For a beginner, the practical lesson is simple: learn the braking pattern first, then add uncertainty.
Sets, Reps, and Rest for Deceleration Drills
Deceleration practice should focus on movement quality rather than turning every drill into conditioning.
| Level | Sets | Reps | Rest | Main Focus |
|---|---|---|---|---|
| Beginner | 2–3 | 3–5 | 45–60 sec | Control |
| Developing | 2–3 | 4–6 | 45–75 sec | Faster braking |
| Reactive | 2–3 | 3–5 | 60–90 sec | Reaction + control |
These ranges are practical starting points, not fixed rules. Age, drill distance, training level, and practice goals can change the workload.
Stop or reduce the difficulty when braking technique begins to break down.
Common Deceleration Mistakes
Beginners often lose control because they brake too late or try to stop too quickly. Use this table to spot common deceleration mistakes and fix them before adding faster or reactive drills.
| Common Mistake | What Happens | Simple Fix |
|---|---|---|
| Stopping in one hard step | Player loses balance or makes a rushed plant. | Start braking earlier and use several shorter steps. |
| Braking too late | There is not enough space to slow down. | Mark a braking zone before the final cone. |
| Running past the cone | Player cannot control the current approach speed. | Reduce speed or shorten the approach distance. |
| Staying too upright | Player has less control while slowing down. | Allow natural bend at the ankles, knees, and hips. |
| Dropping too low | Player may struggle to move into the next action. | Bend enough to control speed while staying ready to move. |
| Poor foot placement | The final plant becomes long or uncontrolled. | Use shorter foot contacts as speed decreases. |
| Taking extra recovery steps | Player needs more time before cutting or accelerating again. | Lower the approach speed and focus on a balanced finish. |
| Losing upper-body control | Large arm or torso movement affects balance. | Keep the torso controlled and use the arms naturally. |
| Looking down | Player loses field awareness during the stop. | Keep the eyes up through the braking action. |
| Adding reaction too early | Technique breaks down when a signal or cut is added. | Learn planned stops first, then add reactive drills. |
Fix these mistakes at a controlled speed first. Increase the approach speed only when the player can brake, stay balanced, and finish ready for the next football movement.
Deceleration Drills by Football Position
Deceleration looks different across football positions. The basic skill stays the same, but the movement before and after braking can change.
| Position | Common Football Situation | Recommended Drill |
|---|---|---|
| Wide Receiver | Slowing before a route break | Sprint-Plant-and-Cut |
| Running Back | Braking before planting and cutting | 45-Degree Deceleration and Cut |
| Defensive Back | Stopping a backpedal before driving forward | Backpedal-to-Stop |
| Linebacker | Slowing while reacting to a ball carrier | Reactive Coach-Call Stop |
| Quarterback | Controlling movement before resetting | 5-Yard Build-Up and Brake |
Beginner Deceleration Progression

Beginners should learn basic braking control before adding fast cuts or unpredictable reactions. Use this progression to make the drills harder as technique improves. Beginners should learn basic braking control before adding faster cuts or unpredictable reactions. USA Football’s skill development progression also supports teaching skills step by step before adding more difficult elements.
| Level | Training Focus | Suggested Drill | Move On When |
|---|---|---|---|
| 1. Controlled Stop | Learn to slow down and finish balanced. | Sprint-to-Stop | Player stops without stumbling or extra recovery steps. |
| 2. Faster Deceleration | Control more speed while braking. | 10-Yard Sprint-to-Decelerate | Technique stays controlled at a faster approach speed. |
| 3. Planned Cut | Brake, plant, and change direction. | Sprint-Plant-and-Cut | Player makes a clean cut without losing balance. |
| 4. Re-Acceleration | Brake and build speed again. | Decelerate-to-Re-Accelerate | Player moves again without unnecessary recovery steps. |
| 5. Reactive Deceleration | React to an unknown signal while braking. | Reactive Coach-Call Stop | Player reacts while keeping good braking control. |
Progress based on movement quality rather than the number of completed reps. If balance or braking technique starts to break down, return to the previous level.
How to Measure Deceleration Improvement
Beginners do not need advanced tracking equipment to check progress. A coach can mark a braking zone with cones and watch whether the player:
- stops inside the marked area;
- uses fewer recovery steps;
- stays balanced after braking;
- keeps the torso under control;
- makes a cleaner plant or cut; and
- re-accelerates without a long pause.
As technique improves, test the same drill at a slightly faster approach speed. Do not judge progress only by how fast the player stops. The player should also finish balanced and ready for the next football movement.
When to Add Deceleration Drills to Football Training
Practice deceleration drills after a dynamic warm-up and before players become heavily tired. This allows beginners to focus on braking technique and body control.
One or two drills per session are enough to start. Choose them based on the player’s main problem. For example, use Sprint-to-Stop for poor stopping control or Backpedal-to-Stop for a defensive back who struggles after backward movement.
Increase speed or add reactive signals only after the basic movement stays controlled.
Continue Your Football Training
Build on your deceleration work with these related football speed and agility guides.
Football Acceleration Drills
Learn drills that help players build speed during the first few yards of movement.
View Training Guide →Sprint Mechanics for Football
Improve sprint posture, first steps, arm action, and running technique.
Improve Sprint Form →Football Agility Drills
Practice cuts, change of direction, balance, and reactive football movement.
Explore Agility Drills →Conclusion
Football deceleration drills help players control speed before a stop, cut, or next football movement. Good braking is not about stopping as hard as possible. It comes from controlled braking steps, balance, and a body position that leaves the player ready to move again.
For beginners, start with simple planned stops at a manageable speed. If a player runs past the target, loses balance, or needs extra recovery steps, reduce the speed before making the drill harder. Once the movement stays controlled, progress to faster approaches, planned cuts, re-acceleration, and reactive drills. Build control first, then add speed and reaction.
FAQs About Football Deceleration Drills
How do football players improve deceleration?
Football players can improve deceleration by starting with controlled sprint-to-stop drills. Focus on braking before the stopping point, using shorter steps, and finishing balanced. As control improves, increase the approach speed, add planned cuts, practice re-acceleration, and then move to reactive drills.
Why does a player keep running past the cone?
A player may run past the cone because they start braking too late or approach faster than they can control. Mark a braking zone before the cone and reduce the approach speed. Increase speed once the player can stop consistently inside the marked area.
How can a football player make cleaner cuts?
Control speed before the plant. Reaching the cut too fast can cause extra steps, poor balance, or a wide turn. Practice basic deceleration first. Then connect the braking steps to a controlled plant, change of direction, and re-acceleration.
What is the difference between acceleration and deceleration drills?
Acceleration drills teach players to gain speed, while deceleration drills teach them to reduce and control speed. Both skills often happen during the same play. A player may accelerate, brake, cut, and then accelerate again.
Should beginners practice reactive deceleration drills?
Yes, but beginners should learn planned stops first. Once a player can slow down and stay balanced at a known stopping point, add simple coach calls or visual signals. The player should maintain good braking control as the drill becomes less predictable.
References
- National Strength and Conditioning Association (NSCA). Effective Deceleration Technique for Court and Field Sports.
- USA Football. Football development and coaching resources.
Use relevant USA Football material where it directly supports beginner football development or practice progression.
