



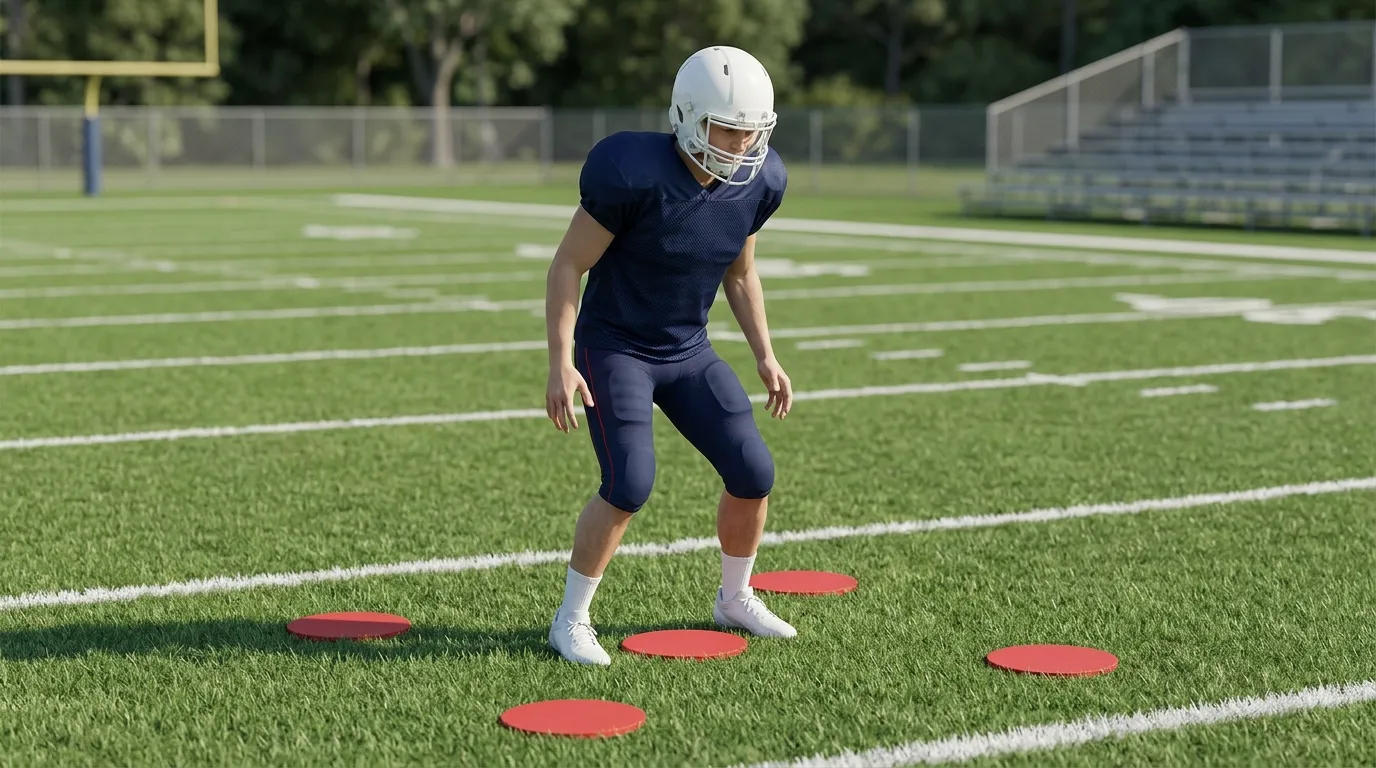
The Dot Drill is a simple footwork exercise that uses five dots arranged in a small pattern. Football players move between the dots using quick two-foot or single-leg hops.
The drill can help players practice quick feet, coordination, balance, foot placement, and controlled landings. It also works well as a short warm-up before football training.
For beginners, speed should not be the first goal. Learn the pattern, land under control, and hit each dot accurately. Once the movement feels natural, increase your speed. The Dot Drill can also be used alongside other football footwork drills that develop balance, rhythm, and controlled movement.
What Is the Dot Drill?
The Dot Drill is a five-dot footwork and agility drill. The dots are usually arranged like the number five on a die, with four outside dots and one center dot.
Players move between these points using different hopping patterns. Some patterns use both feet. Others use one foot or include a turn.
The traditional version was popularized by the Bigger Faster Stronger (BFS) training system. Its routine uses five drills performed six times each. Catalyst Athletics notes that BFS helped popularize the Dot Drill and its five-pattern routine. Other coaches use different patterns, distances, and timed versions.
For football beginners, the Dot Drill is best used as a simple way to practice fast but controlled foot movement.
Dot Drill Setup for Football Players
You need very little equipment to perform the drill.
Equipment
- Five flat dots or markers
- A safe, non-slip training surface
- Athletic shoes or football cleats if training on grass
- Stopwatch if you want to track time
Arrange the five markers like this:
D E
** C**
A B
Dots A and B form the starting end. Dot C sits in the center. D and E form the opposite end.
How Far Apart Should Dot Drill Dots Be?
There is no single spacing used for every version of the Dot Drill.
Some traditional versions use a compact pattern. Other football versions use greater spacing. Your spacing should match the type of movement you want to practice.
For a beginner, start with a compact setup that allows short, controlled hops. The goal is not to make long jumps between the markers.
Once your movement is accurate and balanced, you can adjust the setup for different variations.
Coach Tip: Do not make the dots farther apart just to make the drill harder. Clean foot contacts and body control matter more than jump distance.
How to Do the Dot Drill Step by Step
Start with the basic two-foot pattern before trying single-leg or turning variations.
- Stand with one foot on dot A and the other on dot B.
- Keep your knees slightly bent.
- Jump forward and bring both feet together on the center dot C.
- Jump forward again and split your feet onto dots D and E.
- Reverse the movement.
- Bring both feet back to C.
- Finish with your feet split on A and B.
- Repeat the pattern with a smooth rhythm.

Move quickly, but stay under control.
Your feet should land close to the center of each target. If you keep missing the dots, reduce your speed.
Proper Dot Drill Technique
Good technique makes the drill more useful. It also helps beginners build the correct movement pattern before adding speed.
Keep these coaching points in mind:
- Keep your knees slightly bent. Avoid landing with stiff, straight legs.
- Stay balanced. Your body should remain controlled as your feet move quickly.
- Use short, quick contacts. Do not turn each movement into a high jump.
- Land under control. Your feet should hit the intended dots instead of landing randomly around them.
- Keep your hips controlled. Avoid excessive side-to-side movement.
- Keep your upper body stable. Do not swing your torso to create speed.
- Use natural arm action. Let your arms help with balance and rhythm.
- Build speed gradually. Learn the pattern before trying to complete it as fast as possible.
Strength coach Josh Everett describes the Dot Drill as a low-level plyometric exercise and recommends slightly flexed knees and hips when teaching landing and cutting mechanics.
For beginners, a simple rule works well:
Accuracy → Control → Speed
5 Dot Drill Patterns

Dot Drill sequences can vary between coaching systems. Mountain Tactical Institute’s Dot Drill uses five individual sequences, including two-foot, single-leg, and 180-degree turning patterns. For beginners, it is better to learn the basic two-foot movement first. Then progress to single-leg and turning patterns.
1. Up and Back
Start with your feet split between the two bottom dots.
Jump forward and bring both feet together on the center dot. Then jump forward again and split your feet between the two top dots.
Reverse the movement:
Top dots → Center dot → Bottom dots
Keep facing forward throughout the pattern.
This is a good starting pattern for learning the basic Dot Drill rhythm, foot placement, and body control.
2. Right Foot
Perform the pattern using only your right foot.
Hop between the center and outside dots while staying on the same leg. Keep each hop short and controlled.
Focus on landing close to the target dot before making your next movement.
Single-leg patterns require more balance than the basic two-foot version. Slow down if you start missing the dots or losing control.

3. Left Foot
Repeat the single-leg pattern using only your left foot.
Use short hops and try to land accurately on each target. Keep your knee slightly bent as you land and maintain your balance before the next hop.
Try to use the same control on both legs rather than moving faster on your stronger side.
4. Both Feet
Perform the pattern with both feet moving together.
Move between the center and outside dots using short, quick hops. Keep both feet working as a pair throughout the pattern.
Stay light on your feet and keep the jumps low. Focus on rhythm, accurate foot placement, and controlled landings.
5. Turn Around
Once you can perform the basic patterns with control, add a 180-degree turn.
Move through the five-dot pattern using both feet. At the turning point, jump and rotate 180 degrees before continuing the pattern in the opposite direction.
Land under control after the turn before making your next movement.
This variation requires more coordination and body control. Beginners should learn the basic two-foot and single-leg patterns before adding the turn.
Recommended Reps, Sets and Rest
There is no universal Dot Drill prescription. The traditional BFS Dot Drill routine uses six consecutive repetitions of each of its five patterns. Other Dot Drill versions may use timed work instead. For beginners, the ranges below are a practical starting point rather than a fixed rule.
Beginners do not need to start with the full traditional routine.
| Level | Work | Sets | Rest |
|---|---|---|---|
| Beginner | 3–5 clean reps per pattern | 1–2 | 30–60 sec |
| Developing | 5–6 reps per pattern | 2 | 30–60 sec |
| Advanced | Timed or full pattern work | 2–3 | As needed for quality |
Treat these as practical starting ranges rather than strict rules.
Stop a set when your landings become sloppy or you keep missing the dots. More repetitions are not useful if movement quality falls.
Benefits of the Dot Drill for Football Players
Improves Quick Foot Contacts
Football often requires players to move their feet quickly while keeping their body under control.
The Dot Drill gives players repeated chances to practice short and fast foot contacts.
Develops Coordination
Each pattern requires your feet and body to follow a set sequence. Players who need more work in this area can also practice coordination drills for football that use different movement patterns and challenges.
As the patterns become harder, you must coordinate your feet while maintaining rhythm and balance.
Builds Better Foot Placement
You cannot simply jump anywhere.
Each movement has a target. This encourages accurate foot placement instead of uncontrolled movement.
Challenges Balance and Body Control
Single-leg patterns add an extra balance challenge.
Players must control each landing before moving to the next dot.
Practices Landing Control
The drill uses repeated low-level jumps and hops.
Keeping the knees and hips slightly bent helps the athlete absorb each landing rather than landing with stiff legs.
Works Well in a Warm-Up
The Dot Drill can be used as part of a football warm-up before harder speed or agility work.
Catalyst Athletics and BFS both describe the drill as a warm-up activity.
Keep the volume low enough that the drill prepares you for training instead of tiring your legs.
Beginner Dot Drill Progression
Do not start with the hardest variation.
Use this simple progression.
Stage 1: Learn the Layout
Walk through the pattern first.
Learn where A, B, C, D, and E are located.
Stage 2: Basic Two-Foot Pattern
Perform the Up and Back pattern at a slow pace.
Focus on hitting the dots and keeping your balance.
Stage 3: Add Speed
Once the pattern feels natural, make your foot contacts quicker.
Do not sacrifice accuracy.
Stage 4: Add Single-Leg Patterns
Practice the Right Foot and Left Foot variations.
Start slowly because these patterns require more balance and control.
Stage 5: Add More Complex Patterns
Try the Both Feet and Turn Around variations.
You can also add a figure-8 pattern once you are comfortable with the basic drill.
Stage 6: Add Reaction
A coach or partner can call out numbered or lettered dots.
React to the call and move to the correct target.
This changes the task from a fully planned pattern to a more reactive exercise.
Common Dot Drill Mistakes
| Common mistake | Why it is a problem | Simple fix |
|---|---|---|
| Moving too fast too soon | Accuracy and balance break down | Learn the pattern slowly first |
| Jumping too high | Makes each contact slower | Keep hops low and quick |
| Landing with stiff legs | Reduces landing control | Keep a slight bend in the knees and hips |
| Missing the dots | Shows that speed is too high | Slow down and hit each target |
| Taking large jumps | Changes the purpose of the drill | Use short, controlled movements |
| Losing balance | Makes the next contact harder | Reset your posture before increasing speed |
| Ignoring the weaker leg | Creates uneven practice | Train right and left single-leg patterns |
| Doing too many reps | Technique becomes sloppy | Stop when movement quality drops |

When Should Football Players Use the Dot Drill?
The Dot Drill fits best near the start of a football training session.
For example:
General warm-up → Dot Drill → agility or speed work → football drills
Keep it short if you are using it as a warm-up.
The goal is to prepare your feet and lower body for training. You should not finish the Dot Drill with tired legs before important sprint or football work.
It can also be used as a separate footwork exercise during an agility session.
How to Track Your Dot Drill Progress
Do not judge improvement by speed alone.
Beginners can track three things:
1. Accuracy: Are you hitting the correct dots?
2. Clean repetitions: How many reps can you complete without losing the pattern?
3. Time: Once your technique is consistent, can you complete the same pattern faster without losing control?
This gives you a better progression than trying to beat the stopwatch from day one.
A faster time only matters if your movement stays clean.
How to Do the Dot Drill Without a Mat
You do not need a special Dot Drill mat.
You can create the five-point layout using:
- Flat training markers
- Floor-safe tape
- Temporary field markings
- Small flat cones
Avoid tall cones because you may land on them during the hopping patterns.
Choose a flat surface with enough grip for safe landings.
For home training, make sure you have enough clear space around the pattern before starting.
Dot Drill vs Agility Ladder
Both drills can be useful for football footwork, but they are not the same.
| Dot Drill | Agility Ladder |
|---|---|
| Uses five target points | Uses multiple ladder boxes |
| Includes hops and jumps | Often uses steps and shuffles |
| Can use single-leg patterns | Often uses alternating foot patterns |
| Challenges landing accuracy | Challenges foot sequence and rhythm |
| Uses a compact area | Usually moves along a longer path |
You do not have to choose one over the other. They can train different footwork patterns within the same training program.
For a ladder-based progression, try the Icky Shuffle Drill, which uses an in-in-out stepping pattern as the player moves forward through the ladder.
What the Dot Drill Does Not Train
The Dot Drill can be useful, but it should not become your entire agility program. Combine it with other football agility drills that challenge movement over greater distances, different directions, and game-like situations.
It does not replace:
- Full-speed sprinting
- Acceleration training
- Reactive football drills
- Full-speed change-of-direction work
- Position-specific skills
- Football practice
Players also need dedicated change of direction training to practice braking, planting, and moving into a new direction at greater speed.
A player can become very good at a planned Dot Drill without automatically becoming faster in every football situation.
Use the drill as one part of a larger football training plan.
Dot Drill Safety Tips
Start with the easiest pattern and progress slowly.
Use a flat surface with good grip. Keep your landing area clear of objects. Wear suitable footwear for the surface.
Keep your knees and hips slightly bent during landings. Avoid chasing faster times when your technique begins to break down.
Stop if a movement causes pain.
Young or new players should focus on controlled two-foot patterns before adding harder single-leg or turning variations.
Continue Learning
Build on the Dot Drill with these beginner-friendly football footwork and agility guides.
Football Footwork Drills
Practice quick feet, balance, and controlled movement with simple football footwork drills.
Read the Guide →Coordination Drills for Football
Improve body control, movement timing, and coordination with beginner-friendly drills.
Learn More →Icky Shuffle Drill
Learn the step pattern, proper technique, and beginner progression for this ladder drill.
Try This Drill →Football Agility Drills
Explore more drills for footwork, body control, reaction, and change of direction.
Explore Agility Drills →Final Takeaway
The Dot Drill for football is a simple way to practice quick feet, coordination, balance, accurate foot placement, and controlled landings.
Start with five dots and learn the basic Up and Back pattern. Keep your hops short and controlled. Then add speed, single-leg work, turns, and reaction variations as your technique improves.
Most of all, do not confuse fast movement with good movement.
Hit the dots accurately. Stay balanced. Then get faster.
Frequently Asked Questions
Is the Dot Drill good for football players?
Yes. It can be used as a footwork or warm-up exercise for football players. It helps players practice quick foot contacts, coordination, balance, and controlled movement. However, it should support rather than replace sprinting, reactive agility, and football-specific practice.
Is the Dot Drill a plyometric exercise?
Yes. The drill includes repeated jumps and hops, so it can be considered a low-level plyometric exercise. Beginners should start with simple two-foot patterns before moving to harder single-leg variations.
How many dots are used in a Dot Drill?
The standard Dot Drill uses five dots. Four form the outside corners, while one sits in the center.
How long should beginners do the Dot Drill?
Beginners should focus on a small number of clean repetitions rather than a long workout. Start with one or two simple patterns and take enough rest to maintain good technique.
Can I do the Dot Drill without a mat?
Yes. Five flat markers or safe floor markings can create the same basic pattern. Make sure the surface has good grip and the markers do not create a tripping hazard.
Should I do the Dot Drill before or after football practice?
It often works best early in a training session as part of the warm-up or footwork preparation. Keep the volume low so your legs stay fresh for faster and more demanding football work.
References
- Everett, J. (2008). Why Dots: The Dot Drill. Catalyst Athletics.
Catalyst Athletics: Why Dots – The Dot Drill
Isko traditional BFS patterns, six repetitions, warm-up use, landing mechanics aur reaction variation ke support ke liye use kar sakti ho. Catalyst Athletics - Mountain Tactical Institute. (2014). DOT Drill.
Mountain Tactical Institute: DOT Drill
Isko five-dot setup aur five movement sequences, including two-foot, single-leg aur 180° turn patterns, ke support ke liye use karo.
