



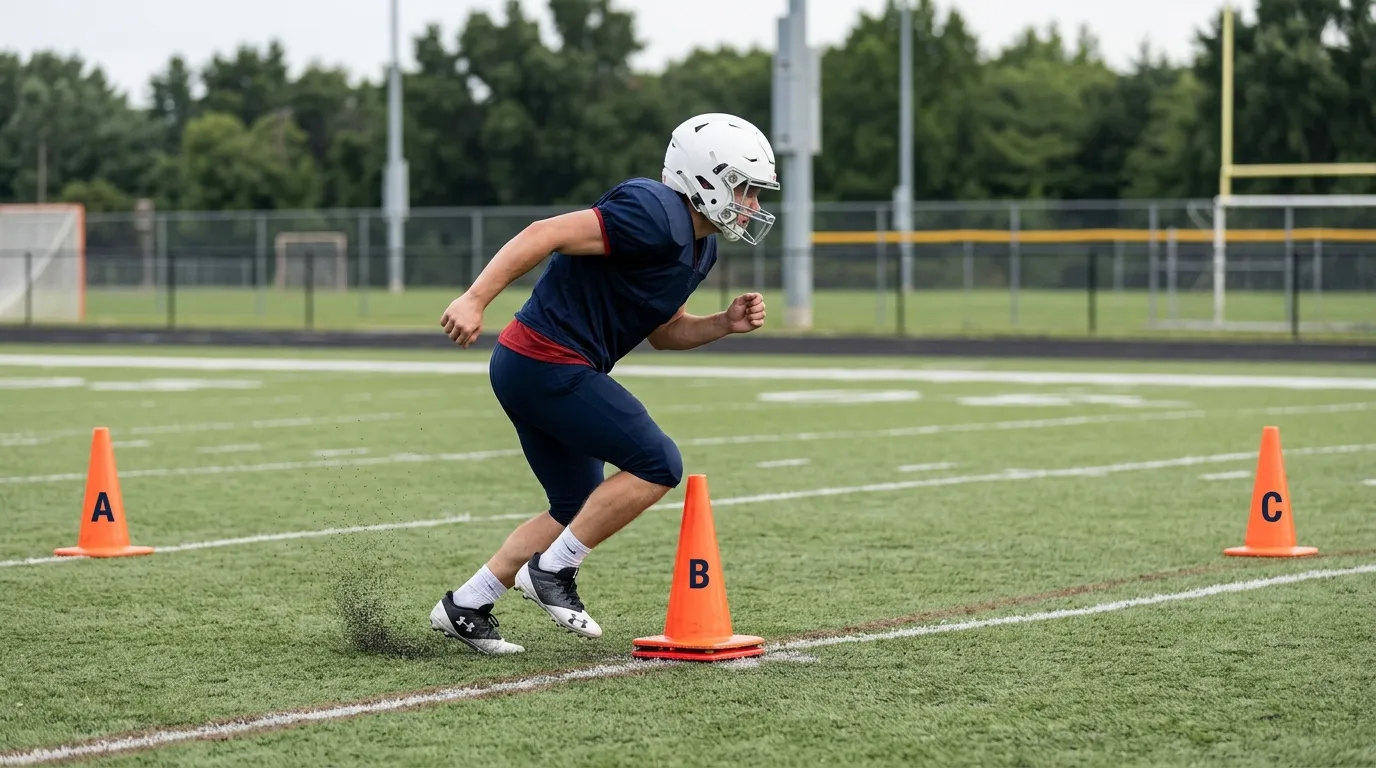
Quick Answer: What Are Change of Direction Drills for Football?
Change of direction drills for football are planned exercises that teach players to slow down, plant, cut, and move in a new direction. Common examples include the 45-degree cut, 90-degree cut, T Drill, 5-10-5 Shuttle, L Drill, and Zig-Zag Drill.
Good change of direction technique combines deceleration, body control, foot placement, redirection, and re-acceleration.
For new coaches, start with one or two simple cutting drills before using harder patterns with several direction changes.
Introduction
Football players rarely move in one straight line for an entire play. A running back may cut away from a defender. A wide receiver changes direction during a route. A defensive back may backpedal, plant, and drive toward the ball.
Change of direction drills for football teach players how to slow down, plant the foot, redirect the body, and gain speed again with control. For youth and beginner coaches, these drills provide a simple way to teach cutting technique before adding faster or more reactive movement.
The goal is not to make every cut as fast as possible from the first rep. Teach the movement first. Once players can stay balanced and control the plant, gradually increase the speed. Players who are still building basic movement skills can also use these football footwork drills to improve control and positioning.
Key Takeaways
- Change of direction, or COD, means redirecting movement into a planned direction.
- Players need to control their speed before making a sharp cut.
- Lowering the hips and controlling foot placement can help create a cleaner direction change.
- COD training is different from reactive agility training.
- Beginners should learn planned cuts before adding reaction cues.
- Football players should practice changing direction to both sides.
- Coaches should focus on movement quality before adding more reps or speed.
What Are Change of Direction Drills for Football?
Change of direction drills teach a player to redirect movement while staying balanced and ready to move again. The player usually knows the movement pattern before starting the drill.
A COD movement may include a forward sprint, lateral shuffle, backpedal, plant, turn, or cut. The exact movement depends on the drill and football position.
Change of direction is also different from straight-line speed. A fast player still needs enough control to slow down and redirect the body. Research on COD performance has identified factors such as braking and propulsive forces, ground contact, and how athletes manage the steps around a direction change.
For football, this skill matters because many plays require players to move in more than one direction.
Change of Direction vs Agility: What’s the Difference?

COD and agility are closely related, but they are not the same skill.
| Change of Direction | Agility |
|---|---|
| Movement is planned | Movement includes a reaction |
| Player knows the direction | Direction may be unknown |
| Focuses on physical movement | Adds perception and decision-making |
| Example: planned 5-10-5 Shuttle | Example: reacting to a coach or opponent |
Research also treats planned change of direction and reactive agility as different performance qualities, so coaches should consider whether a drill requires a known movement or a response to a stimulus.
A player running a planned T Drill is practicing change of direction. If a coach points left or right during the drill and the player must react, the task becomes more agility-based.
The NSCA also describes progressing basic COD work toward reactive training by adding visual, sound, and mixed cues. Players should first develop good body control and technique before drills become less predictable.
Coach’s Tip: Teach the pattern first. Add a reaction later. This makes it easier to see whether the player has a movement problem or is simply reacting late.
For drills that add reaction, decision-making, and unpredictable movement, see our football agility drills guide.
Why Change of Direction Matters in Football
Football includes short bursts of movement, stops, cuts, turns, and changes in body position. The type of COD movement also changes by position.
Running backs cut through gaps and redirect when defenders close space.
Wide receivers use planned cuts during routes and when trying to create separation.
Defensive backs may backpedal, plant, and drive toward a receiver or the football.
Linebackers shuffle, pursue, and redirect as the play develops.
Quarterbacks may reset their position or move inside and outside the pocket.
Because these movements are different, there is no single COD drill that is best for every football player. Coaches should choose drills based on the movement the player needs to practice.
How to Teach a Change of Direction

For a new coach, it helps to break the movement into six simple phases:
Approach → Decelerate → Lower → Plant → Redirect → Re-accelerate
Do not try to correct all six phases during every rep. Watch the player first, find the biggest problem, and use one simple coaching cue.
1. Approach Under Control
The player approaches the cut with enough speed to make the drill realistic but still needs control.
Entering a sharp cut too fast can lead to extra braking steps, a wide turn, or poor balance.
Coach cue: “Control the last few steps.”
2. Decelerate Before the Cut
The player needs to reduce speed before a major change in direction.
This does not mean stopping before every cut. The amount of braking depends on the angle and approach speed. Sharper direction changes usually require more braking than small changes in angle.
Keep the focus here on preparing for the cut. Dedicated braking exercises belong in separate deceleration training.
Coach cue: “Slow enough to own the cut.”
Players who struggle to slow down before the plant can first work on football deceleration drills to improve braking control.
3. Lower the Hips
As the player prepares to cut, a lower body position can help control the movement.
Avoid turning this into a deep squat. The player needs an athletic position that still allows a quick push into the next direction.
Coach cue: “Lower before you plant.”
4. Control the Plant Foot
The plant connects the old direction with the new one.
The foot should give the player a stable position from which to redirect the body. Reaching too far outside the body can make the movement harder to control.
Watch the foot, knee, hips, and upper body together rather than focusing only on the foot.
Coach cue: “Plant under control.”
5. Redirect the Body
The hips and torso should begin moving into the new path.
The player should avoid planting in one direction while the upper body continues moving somewhere else.
Coach cue: “Turn the body with the cut.”
6. Re-Accelerate
The cut is not finished at the plant.
Football players often need to gain speed again as soon as they enter the new direction. Quick first steps and active arm movement can help them leave the cut.
The deeper details of gaining speed belong in acceleration training. Here, re-acceleration is simply the final part of the COD movement.
Coach cue: “Finish through the cut.”
For more work on the first steps after a cut, use these football acceleration drills. Players who need help with posture, arm action, and running form can also work on sprint mechanics for football.
10 Best Change of Direction Drills for Football
New coaches do not need a large collection of complicated drills. Start with two or three drills that match the player’s needs.
1. 45-Degree Cut Drill
Setup: Place two cones 5 to 7 yards apart. Add a third cone at about a 45-degree angle from the second cone.
How to perform: Sprint toward the second cone. Reduce speed enough to stay in control, plant, cut at 45 degrees, and accelerate toward the final cone.
Reps: Start with 3 to 4 reps per side.
Coaching cue: Control the approach and leave the cut balanced.
Best for: Beginners, running backs, and receivers.
2. 90-Degree Cut Drill
Setup: Place one starting cone, one plant cone, and a third cone at a 90-degree angle.
How to perform: Approach the plant cone, control the final steps, plant, redirect the body, and accelerate toward the third cone.
Reps: 3 to 4 per side.
Coaching cue: Lower before the plant instead of trying to turn from an upright position.
Best for: Route cuts and sharper direction changes.
3. Zig-Zag Cut Drill
Setup: Arrange 5 to 6 cones in a zig-zag pattern.
How to perform: Move from cone to cone while making a controlled cut at each marker. Start at a moderate speed. Increase speed only when each cut stays clean.
Reps: 3 to 5 trips through the pattern.
Coaching cue: Avoid taking several small steps around each cone.
Best for: Multiple cuts, body control, and foot placement.
See the full Zig-Zag Drill guide for the complete setup, technique, and progression.
4. T Drill
Setup: Arrange four cones in a T shape.
How to perform: Sprint forward to the middle cone, move laterally across the top of the T, change direction, cross to the opposite side, return to the middle, and finish back toward the start.
Reps: 3 to 5 quality reps.
Coaching cue: Keep the hips controlled during lateral changes.
Best for: Multidirectional movement, linebackers, and defensive backs.
Use our T Drill guide for the full cone setup, movement pattern, and coaching tips.
5. 5-10-5 Shuttle Drill
Setup: Place three cones in a straight line, 5 yards apart.
How to perform: Start at the middle cone. Sprint 5 yards to one side, change direction, run 10 yards to the far cone, then turn and finish through the middle.
Reps: 2 to 4 reps, alternating the starting direction.
Coaching cue: Control the final steps before each 180-degree turn.
Best for: Sharp direction changes and testing planned COD speed.
See the complete 5-10-5 Shuttle Drill guide for setup, technique, and common mistakes.
6. L Drill
Setup: Use three cones placed 5 yards apart in an L shape.
How to perform: Sprint between the cones while following the L-shaped pattern. The drill includes acceleration, turning, and changes at different angles.
Reps: 2 to 4 reps each direction.
Coaching cue: Keep the path tight without losing balance around the cones.
Best for: Multiple movement angles and football footwork.
Our L Drill guide explains the full setup, movement path, and coaching cues.
7. Box Change of Direction Drill
Setup: Place four cones in a square.
How to perform: Move around the box using a planned pattern of forward sprinting, lateral movement, backpedaling, or cuts.
Reps: 3 to 4 rounds.
Coaching cue: Finish one movement under control before changing into the next.
Best for: Defensive players and multidirectional movement.
See the Box Drill guide for the full cone setup and movement variations.
8. Plant-and-Go Drill
Setup: Place a start cone and plant cone about 5 yards apart. Add exit cones to the left and right.
How to perform: Tell the player which direction to use before the rep. Sprint toward the plant cone, plant, redirect, and accelerate for another 5 yards.
Reps: 3 to 4 per side.
Coaching cue: Push into the new direction instead of simply turning the feet.
Best for: Beginners learning how to connect the plant with exit speed.
9. Backpedal-to-Break Drill
Setup: Place a starting cone with two exit cones several yards ahead and to each side.
How to perform: Backpedal from the start. At the planned point, plant and drive forward toward the selected exit cone.
Reps: 3 to 4 each side.
Coaching cue: Keep the backpedal controlled so the plant stays clean.
Best for: Defensive backs and linebackers.
10. Route Cut Drill
Setup: Mark the start and route break with cones.
How to perform: Run the first part of the route. Control the steps near the break point, make the planned cut, and accelerate through the next part of the route.
Reps: 3 to 5 per route and direction.
Coaching cue: Run through the cut rather than stopping at the cone.
Best for: Wide receivers and defensive backs working on route movement.
Which Change of Direction Drill Should You Choose?
If you are new to coaching, choose the drill based on the movement problem you see rather than picking the hardest drill.
| If Your Player Needs To… | Start With |
|---|---|
| Learn a basic cut | 45-Degree Cut |
| Make sharper cuts | 90-Degree Cut |
| Control several cuts | Zig-Zag Drill |
| Combine lateral and forward movement | T Drill |
| Improve 180-degree turns | 5-10-5 Shuttle |
| Work through several angles | L Drill |
| Practice defensive movement | Backpedal-to-Break |
| Improve receiver route cuts | Route Cut |
| Connect the plant with exit speed | Plant-and-Go |

A beginner may only need the 45-degree cut and Plant-and-Go Drill at first. There is no need to use all 10 drills in the same practice.
Coaching Cues for Better Cuts
Simple cues are easier for beginners to use during practice.
- Control the approach. Do not attack every sharp cut at full entry speed.
- Lower before the cut. Change body position before the plant.
- Stay balanced. The player should leave the plant ready for the next step.
- Watch foot placement. Avoid reaching far outside a stable position.
- Move the body with the cut. The hips and torso should redirect with the feet.
- Push out of the plant. Do not pause after changing direction.
- Finish the rep. Accelerate through the exit instead of stopping at the cone.
- Train both sides. Give the left and right sides similar practice.
Coach’s Tip: Correct one main problem at a time. Too many instructions can make a simple drill harder for a beginner.
Common Change of Direction Mistakes and How to Fix Them
Entering the Cut Too Fast
Problem: The player reaches the cone with too much speed and needs several extra steps.
Fix: Reduce the approach speed until the player can control the plant. Build speed from there.
Staying Too Upright
Problem: The player tries to make a sharp cut without changing body position.
Fix: Ask the player to lower the hips before the plant.
Planting Too Far From the Body
Problem: The player reaches for the ground and loses a stable position.
Fix: Slow the drill and watch where the plant foot contacts the ground.
Taking Too Many Braking Steps
Problem: The player uses several short steps before every cut.
Fix: Return to a simple 45-degree cut and practice controlling the final approach steps.
Losing Balance After the Cut
Problem: The player changes direction but cannot control the next step.
Fix: Reduce speed. Do not increase it again until the player can leave the cut balanced.
Looking Down at the Cones
Problem: The player watches every cone instead of keeping the eyes up.
Fix: Let the player learn the pattern first. Then ask them to use the cones as markers without staring at them.
Failing to Re-Accelerate
Problem: The player makes the cut but stays slow afterward.
Fix: Add a short 3-to-5-yard exit sprint after the cut.
How to Progress Change of Direction Training
Beginners should not start with difficult reaction drills. Build the movement step by step.
Stage 1: Learn Planned Cuts
Start with the 45-degree and 90-degree cut drills at a controlled speed.
Stage 2: Add Speed
Increase approach speed once the player can plant and leave the cut with control.
Stage 3: Add Multiple Direction Changes
Move to the Zig-Zag, T Drill, L Drill, or 5-10-5 Shuttle.
Stage 4: Add Football-Specific Movement
Use route cuts, backpedal breaks, ball carrying, and other movements that fit the player’s position.
Stage 5: Add a Reaction
Once technique stays consistent, the coach can use a point, partner, football, or opponent movement to determine the direction.
At this stage, training begins to move from planned change of direction into reactive agility. Keep those two training goals clear when choosing drills.
Best Change of Direction Drills by Football Position
Use position needs to help choose drills rather than giving every player the same session.
| Position | Useful COD Drills | Main Focus |
|---|---|---|
| Running Back | 45° Cut, Zig-Zag, Plant-and-Go | Cutting and exit speed |
| Wide Receiver | 90° Cut, Route Cut, L Drill | Route breaks |
| Defensive Back | Backpedal-to-Break, T Drill, Route Cut | Backpedal and drive |
| Linebacker | T Drill, Box Drill, 5-10-5 | Lateral movement and pursuit |
| Quarterback | L Drill, Box Drill | Controlled pocket movement |

These are starting points rather than strict rules. Coaches can change drill selection based on what they see during practice.
Sets, Reps, and a Simple COD Training Plan
More reps are not always better. If players become tired and their technique starts to fall apart, extra reps may have little value.
For beginners, use a small number of drills and give players enough recovery to perform each rep with control.
| Level | Drills per Session | Suggested Reps | Main Goal |
|---|---|---|---|
| Beginner | 2–3 | 3–4 each side | Learn technique |
| Developing | 3–4 | 3–5 | Add speed and harder angles |
| Experienced | 3–5 | Depends on drill | Add football and reactive demands |
Simple 15-Minute COD Session for Beginners
3 minutes: Dynamic movement preparation
3 minutes: 45-degree and 90-degree cuts
4 minutes: Zig-Zag or T Drill
3 minutes: One position-specific COD drill
2 minutes: Review clean cuts or add a simple reaction for players who are ready
Change of direction work should usually happen while players are fresh enough to control their movement. If technique drops, reduce the speed, reps, or drill difficulty.
How to Measure Change of Direction Improvement
Do not judge progress only by a stopwatch.
A coach can also watch:
- Fewer unnecessary steps before the cut
- Better balance during the plant
- Similar control on the left and right sides
- Better body position
- Cleaner movement at sharper angles
- Faster movement after the cut
- More consistent technique across several reps
The 5-10-5 Shuttle can help track planned COD performance. However, combine the time with what you see.
A player who finishes faster but loses balance at each turn may still need more technique work.
Continue Learning
Keep building your football movement skills with these related training guides.
Football Agility Drills
Add reaction, quick cuts, lateral movement, and decision-making after players learn planned direction changes.
Read the Guide →
Football Acceleration Drills
Improve the first few steps after a cut and learn how to gain speed quickly over short distances.
Improve Acceleration →
Sprint Mechanics for Football
Work on body position, arm action, knee drive, and cleaner sprint form between direction changes.
Learn Sprint Mechanics →
5-10-5 Shuttle Drill
Practice planned 180-degree direction changes, controlled braking, planting, and re-acceleration.
Learn the 5-10-5 →
Conclusion
Change of direction drills for football work best when players learn control before trying to move at full speed. Start with simple 45-degree cuts and Plant-and-Go drills. Then add sharper cuts, multiple direction changes, and position-specific movements as technique improves.
When coaching beginners, I look for one thing before making a drill harder: can the player slow down, plant, change direction, and leave the cut without losing balance? If not, I reduce the speed and clean up the movement first.
Use the same simple sequence when teaching each cut: approach → decelerate → lower → plant → redirect → re-accelerate. Once players can repeat that movement with good control, reactive agility work can be added to make training more game-like.
Frequently Asked Questions
What is the best change of direction drill for football beginners?
The 45-degree cut is a good starting drill because the angle is easier to control than a sharp 90- or 180-degree turn. Once the player can brake, plant, and leave the cut with balance, harder drills can be added.
How can football players change direction faster?
Work on controlled braking, body position, foot placement, planting, and getting back up to speed after the cut. Start at a speed that allows good technique. Increase intensity as control improves.
What is the difference between agility and change of direction?
Change of direction is usually planned. The player knows where to move before starting. Agility adds a reaction to something such as an opponent, coach, ball, or other football cue.
How often should beginners practice change of direction?
Frequency depends on the player’s age, practice schedule, training level, and total workload. New players usually benefit more from a small amount of quality COD practice within regular training than from long sessions filled with repeated cuts.
Can change of direction drills help different football positions?
Yes. Running backs, receivers, defensive backs, linebackers, and quarterbacks all change direction, but they do it in different situations. Coaches should choose drills that match the movements each player needs.
References
- National Strength and Conditioning Association (NSCA). Change of Direction Speed Drill Adaptation. Developing Agility and Quickness, Second Edition.
- Nimphius S, Callaghan SJ, Bezodis NE, Lockie RG. Change of Direction and Agility Tests: Challenging Our Current Measures of Performance. Strength and Conditioning Journal.
- Dos’Santos T, et al. Research examining biomechanical factors related to change-of-direction performance, including braking, propulsive forces, body position, and center-of-mass control.
