



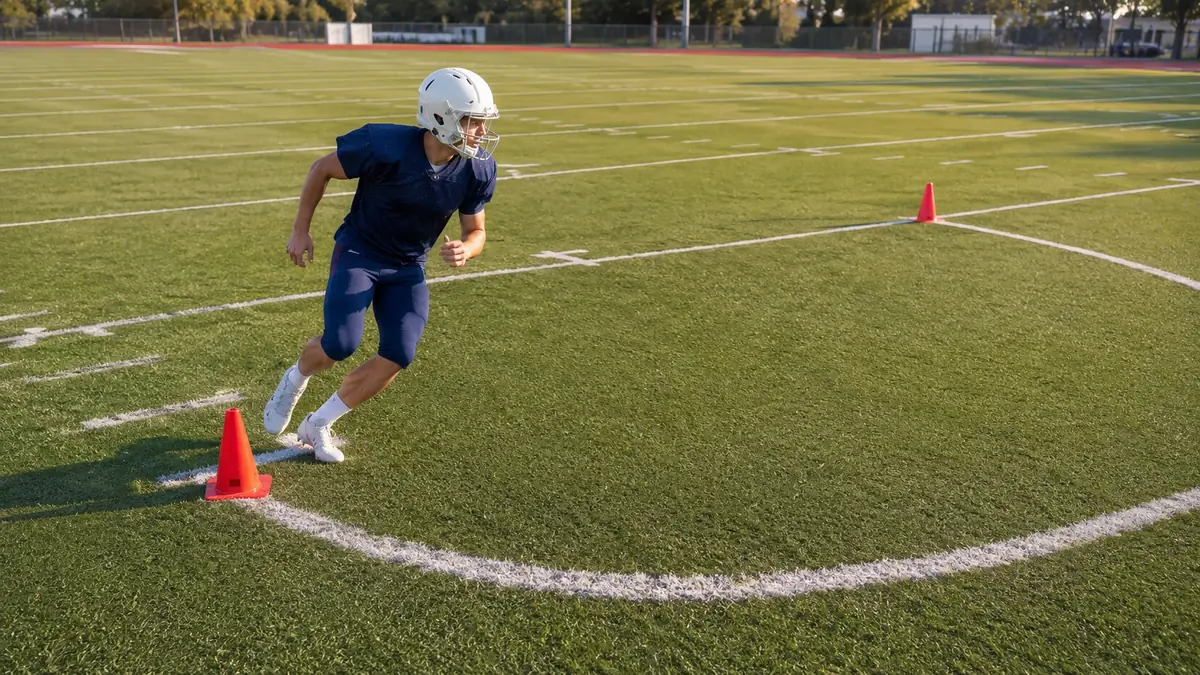
The Figure 8 Drill is a simple football footwork drill that uses a curved running path. The player moves around two markers in the shape of the number eight. It helps players practice controlled turns, quick footwork, balance, and body control.
Unlike drills built around hard cuts, the Figure 8 uses smoother, rounded direction changes. This makes it a useful option for beginners who need to learn how to control their body while moving through turns.
Quick Takeaway
The Figure 8 Drill is a cone drill that uses a continuous figure-eight pattern. Players move around two markers, cross through the middle, and turn in both directions. The main goal is to stay balanced, use controlled steps, and keep a clean curved path instead of making sharp cuts.
What Is the Figure 8 Drill?
The Figure 8 Drill, also called the Figure Eight Drill, is a planned footwork and change-of-direction drill. Two turning areas are set up, and the player follows a curved path around them to form a figure eight.
The movement is different from a drill built around hard 90-degree cuts. Players who want to practice more direct braking and cutting patterns can also use these change of direction drills for football.
For football players, the drill can be used to work on footwork, balance, coordination, and control during curved movement. The standard version is planned, so the player knows the path before starting.
Planned change-of-direction drills can later be made more reactive by adding a coach’s visual or sound cue. The NSCA recommends this type of progression after athletes become comfortable with basic change-of-direction drills.
Benefits of the Figure 8 Drill
The Figure 8 Drill can help players practice several basic movement skills.
- Footwork: Short, controlled steps can help the player move smoothly around each turn.
- Body control: The player must control the hips, upper body, and feet while following the curved path.
- Balance: Turning in both directions asks the player to stay balanced as body position changes.
- Change of direction: The drill includes repeated direction changes without requiring a hard stop at every turn.
- Acceleration and deceleration: Players may need to control their speed as they enter a turn and build speed again as they leave it. The NSCA explains acceleration and deceleration mechanics and how athletes control their steps and body position while preparing for a change of direction.
- Coordination: The arms and legs must work together while the player follows the pattern.
The goal is not simply to finish as fast as possible. Clean movement should come before speed, especially for beginners. For a wider mix of drills that train quick movement, balance, and direction changes, see these football agility drills.
Equipment You Need
The basic drill requires very little equipment:
- Cones or other safe field markers
- A flat training area
- A football for ball-carry variations
- A timer if you want to track consistent timed reps
Make sure the surface provides safe footing and there is enough open space around the drill. The Figure 8 is one of several simple cone drills for football that can be adjusted for age, space, and skill level.
Figure 8 Drill Setup
For a simple two-marker version:
- Place two cones in a straight line with enough space to run between them.
- Use each cone as the center of a turning area.
- Start near one cone.
- Plan a path that curves around both cones and crosses through the middle.
- Make sure the complete path looks like the number eight.

The player follows a continuous curved path around both cones and crosses through the middle.
The turns should be rounded rather than square. Leave enough room for the player to move without stepping on a cone.
How Far Apart Should the Cones Be?
There is no single cone distance used for every Figure 8 Drill.
A closer setup creates tighter turns. A wider setup gives the player more room to build speed between turns. For beginners, use enough space to complete the pattern with good balance and control.
Coaches can adjust the distance based on the player’s age, skill level, available space, and the goal of the drill.
How to Perform the Figure 8 Drill
Follow these steps for the basic running version:
- Start beside the first cone. Use a balanced athletic stance with the knees slightly bent.
- Move into the first turn. Run around the cone on a smooth curved path.
- Stay under control. Keep the body balanced and use short steps as the turn becomes tighter.
- Cross through the middle. Build speed as you move toward the second cone.
- Turn around the second cone. Follow the curve in the opposite direction.
- Cross the middle again. Continue the same pattern to complete the figure eight.
- Finish under control. Slow down safely after completing the planned rep.
Run the drill in both directions so the player practices turning to each side.
Coaching Tips for Better Turns

Small technique changes can make the Figure 8 Drill cleaner.
Stay in a controlled athletic position. Keep some bend in the knees instead of running tall through a tight turn.
Use short steps near the turn. Long reaching steps can make it harder to control the curved path.
Keep the arms controlled. Let the arms support the running motion without swinging wildly across the body.
Stay close to the path. Do not make the turn much wider just to maintain speed.
Keep the eyes up. Players should learn the pattern instead of staring at the cones during every step.
Control speed before adding speed. Beginners should learn the route at a comfortable pace. Increase speed once the movement stays clean.
Practice both directions. Turning left and right gives players practice controlling the pattern from both sides.
Common Figure 8 Drill Mistakes
| Mistake | Simple Fix |
|---|---|
| Running too upright | Add a small knee bend and stay balanced through the turn. |
| Taking very wide turns | Reduce speed and follow a tighter curved path. |
| Using long steps near the cone | Use shorter, controlled steps through the turn. |
| Looking down at the cones | Learn the route first, then keep the eyes up while moving. |
| Losing arm control | Keep the arms working naturally with the legs. |
| Moving too fast too soon | Learn the pattern at a slower pace before increasing speed. |
| Training only one direction | Start reps from both sides or reverse the pattern. |

A common beginner mistake is treating every repetition like a race. A fast rep is not useful if the player loses balance or changes the intended path.
Beginner Figure 8 Drill Progression
Beginners can learn the drill in four simple stages.
1: Learn the path
Walk through the figure eight until the route is clear.

2: Jog under control
Jog around both cones while keeping the turns smooth.
3: Add more speed
Run the pattern faster without losing balance or making the turns too wide.
4: Add a challenge
Use a football or timed rep after the basic movement is consistent.
Players should move to the next stage when they can complete the current version with good control.
Figure 8 Drill Variations
Once the basic pattern is easy to perform, coaches can change the drill without changing its main purpose.
Beginner Figure 8
Increase the space around the turns and use a controlled pace. This gives a new player more time to manage body position and learn the route.
Ball-Carry Figure 8
Carry a football while running the pattern. Keep the ball secure against the body and do not let ball carrying change the running path.
This version can add a football-specific task for players such as running backs and receivers.
Timed Figure 8
Time a consistent setup and compare the player’s own reps.
Do not reward a faster time if the player cuts across the planned path, knocks over markers, or loses control. Use the same setup when comparing times.
Figure 8 Drill vs Sharp-Cut Agility Drills
The Figure 8 Drill uses a different movement pattern from many common football agility drills.
| Figure 8 Drill | Sharp-Cut Drill |
|---|---|
| Curved running path | More direct approach |
| Rounded turns | Sharper cuts |
| Continuous movement | More defined braking and planting |
| Gradual direction changes | Larger changes in direction may happen quickly |
Both types of drills can have a place in football training, but they should not be treated as the same movement.
The Figure 8 is useful when the goal is to practice body control and footwork through a continuous curved path. If you want a cone drill that combines curved running with tighter turns around markers, the L Drill is a useful next progression.
Which Football Positions Can Use the Figure 8 Drill?
Several football positions can use the Figure 8 Drill as a basic movement exercise.
Running backs can practice controlled turns and add a football once the movement is clean.
Wide receivers can use it as a footwork and body-control drill.
Defensive backs can use Figure 8 patterns to practice quick, controlled foot movement. Keep in mind that this drill does not replace coverage or reaction work.
Linebackers can use the basic pattern as part of general change-of-direction training.
The drill should support position training rather than replace position-specific skills.
When to Use the Figure 8 Drill in Practice
The Figure 8 Drill can fit into a footwork or change-of-direction part of practice after players are physically prepared to move at training speed.
For beginners, start with a few quality repetitions and give enough recovery to keep the movement clean. Stop or reduce the speed if technique starts to break down.
Coaches can also use the drill before moving to harder patterns that require sharper cuts or an unpredictable response. If players struggle to slow down before the turn, add simple football deceleration drills before increasing the speed of the Figure 8.
Continue Learning
Build on the Figure 8 Drill with more football drills for agility, footwork, and change of direction.
Frequently Asked Questions
What is the Figure 8 Drill?
The Figure 8 Drill is a footwork and change-of-direction exercise where a player moves around two markers in a continuous figure-eight pattern. It focuses on controlled curved turns rather than repeated hard cuts.
What does the Figure 8 Drill improve?
The drill can be used to practice footwork, balance, coordination, body control, and planned changes of direction. It also gives players practice controlling speed as they enter and leave curved turns.
How far apart should the cones be for a Figure 8 Drill?
There is no single distance required for every version. Closer cones create tighter turns, while wider spacing allows more speed between turns. Choose a distance that lets the player complete the pattern safely with good technique.
Is the Figure 8 Drill good for beginners?
Yes. The pattern is easy to learn and can be performed slowly before speed is added. Beginners should focus on balance, short steps, and clean turns before using timed reps.
How many reps of the Figure 8 Drill should you do?
There is no fixed number that fits every player. Start with a small number of quality reps in both directions. Add volume only while the player can keep good technique. Age, training level, drill speed, and the rest of the practice plan should guide the final amount.
Final Coaching Note
The Figure 8 Drill is simple, but the details matter. Keep the turns smooth, stay balanced, and use controlled footwork around the path. For beginners, clean technique should come before faster times.
Once the basic pattern looks consistent, add speed, a football, or another suitable progression.
References
- NSCA Acceleration and Deceleration Mechanics, for movement mechanics.
- NSCA Change of Direction Speed Drill Adaptation, for planned vs reactive progression.
